Thursday, December 31, 2009

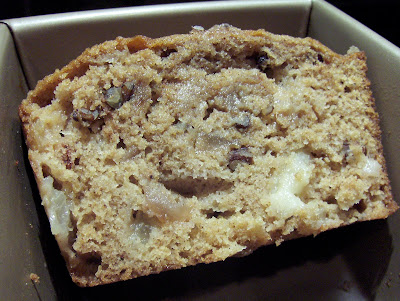
Whole Wheat Pear Bread


For Christmas, Dad and Carla gave us fruit of the month club from Harry and David! I was so excited to receive our first shipment of pears! They were the biggest pears I have ever seen, and they were delicious, but I knew we wouldn't be able to eat them all before they went bad so I decided to bake with them. I wanted to make something somewhat healthy after all the rich foods that are consumed during Christmas and came up with this recipe for some whole wheat pear bread. I thought it was quite tasty, and I was actually surprised at how much Nick liked it. He even said it was better than banana bread! Now, that is a bold statement, and I am not sure I am willing to make that one myself (I love banana bread!). Nevertheless it was yummy and a good variation on the quick breads you usually see.

Ingredients:
2 cups peeled diced pears
1/2 cup white sugar
1 1/2 cups white wheat flour
1/2 tsp salt
3/4 tsp baking soda
1/2 tsp pumpkin pie spice
1/2 tsp cinnamon
1 egg
1/3 cup canola oil
1/3 cup pear butter *
1/3 cup chopped pecans
* We had some pear butter made by Nick's Aunt Frankye, but if you can't find any, I think it would be fine to substitute applesauce- your bread just may be a little less sweet.

Directions:
1. Preheat oven to 325 degrees.
2. Spray a loaf pan with cooking spray with flour.
3. In one bowl, mix the pears, sugar, egg, oil, and pear butter together.
4. In a second bowl, combine the flour, salt, baking soda, cinnamon, and pumpkin pie spice.
5. Add the dry ingredients into the wet ingredients and stir until combined.
6. Stir in the pecans.
7. Pour batter into prepared pan.
8. Bake until a toothpick can be inserted and comes out clean (mine took about 45 minutes).

Sunday, December 27, 2009

Chicken Lettuce Wraps


For our K group (community group) Christmas party, we were all supposed to bring appetizers to share. I wanted to bring something that was healthy (so that I would eat it) but also yummy (so others would eat it)! I decided that chicken lettuce wraps would fit both of those criteria, and I found this recipe from Taste of Home. I thought they were good the first day, but I thought the leftovers were better because the chicken had more time to absorb the flavors of the sauce.


Chicken Lettuce Wraps (from Taste of Home)
Ingredients
* 1-1/2 pounds boneless skinless chicken breasts, cubed
* 1 tablespoon plus 1-1/2 teaspoons peanut oil, divided (I used sesame oil)
* 3/4 cup chopped fresh mushrooms
* 1 can (8 ounces) water chestnuts, drained and diced
* 1 tablespoon minced fresh gingerroot
* 2 tablespoons rice vinegar
* 2 tablespoons reduced-sodium teriyaki sauce
* 1 tablespoon reduced-sodium soy sauce
* 1/2 teaspoon garlic powder
* 1/4 teaspoon crushed red pepper flakes
* 1-1/2 cups shredded carrots
* 1/2 cup julienned green onions
* 12 Bibb or Boston lettuce leaves
* 1/3 cup sliced almonds, toasted

Directions

* In a large nonstick skillet coated with cooking spray, cook chicken in 1 tablespoon oil for 3 minutes; drain. Add the mushrooms, water chestnuts and ginger; cook 4-6 minutes longer or until chicken is no longer pink. Drain and set aside.
* In a small bowl, whisk the vinegar, teriyaki sauce, soy sauce, garlic powder, red pepper flakes and remaining oil. Stir in the carrots, onions and chicken mixture. Spoon onto lettuce leaves; sprinkle with almonds. If desired, fold sides of lettuce over filling and roll up.

Monday, December 14, 2009

Orange Cranberry Cake


Orange and cranberry is one of my favorite flavor combinations. The tartness of the cranberries just goes so well with the sweet, fresh flavor of orange. It is a perfect holiday dessert! I found this recipe on Good Things Catered and chose to make it because I had almost all the ingredients on hand. Nick and I both liked the results despite the fact that I underbaked it a little- oops. I didn't have orange liquor or an orange for the zest so I just substituted extra orange juice in place of liquor and zest.

Orange Cranberry Cake (from Good Things Catered)
Ingredients:
3 c. flour, divided
1 tsp cinnamon
1 tsp baking powder
1/2 tsp baking soda
1/4 tsp salt
1/2 c. unsalted butter, softened
1/2 c. oil
1 2/3 c. granulated sugar
2 Tbsp orange zest (I didn't use, but think it would be better with it!)
1 Tbsp orange liquor (I replaced with OJ)
1 tsp vanilla extract
2 eggs
1/4 c. fresh orange juice
3/4 c. buttermilk
2 c. fresh cranberries

For icing:
2 c. powdered sugar, sifted
1/2 tsp vanilla extract
3-6 tsp fresh orange juice


Directions:
-Preheat oven to 325 degrees spray bundt pan with cooking spray with flour.
-In bowl of stand mixer, add sugar, butter and oil and beat until light and fluffy in texture as well as color, about 5 minutes.
-Meanwhile, in medium bowl, combine 2 1/2 c flour, cinnamon, baking powder, baking soda and salt.
-Whisk to combine well and set aside.
-To sugar mixture, add orange zest.
-One at a time, add egg and beat to combine well.
-Add liquor and vanilla, beating to combine well.
-Add orange juice and buttermilk, mixing to combine well.
-Stop mixer and scrape down sides of bowl.
-With mixer on lowest speed, add flour mixture and mix until almost combined.
-Stop mixer and remove bowl.
-In bowl flour was in, add remaining 1/2 c. flour and cranberries.
-Toss to coat and add to batter.
-Using large spatula, fold cranberries and extra flour into batter just until combined.
-Pour batter into bundt pan.
-Tap on counter to remove air bubbles, smooth top of batter away from center of pan.
-Place into preheated oven on rack in center of oven and bake until toothpick inserted into center of pan comes out clean, about 1 hour.
-Remove from oven and let cool in pan for 20 minutes.
-Turn cake out onto wire rack and cool completely.
-Once cake is cool, in medium bowl, combine powdered sugar, vanilla extract and orange juice, 1 tsp at a time until medium consistency is achieved.
-Drizzle icing over top of cake, decorate with orange rind and fresh cranberries and serve.

Saturday, December 12, 2009

Pasta with Roasted Vegetables and Sausage


We had this for our "Thanksgiving" with Dad, Carla, Josh, and Annie. It's obviously not your traditional Thanksgiving dinner, but we didn't want to have like 5 Thanksgiving dinners and Josh had to run in a 5 mile race the next morning. There is nothing better than pasta for a pre-race meal! Everyone seemed to like it, and it is great for cooking for a group because it doesn't require much extra work for the extra portions :) It is also really healthy because of the whole wheat pasta, vegetables, and using chicken or turkey sausage instead of regular. I will definitely make this again- In fact, I think I am going to make it next week for our K group (church community group)!

Ingredients
* 1 bunch of asparagus, trimmed and cut into 1 in pieces
* 1 red or yellow pepper, sliced
* 1 cup sliced mushrooms
* 1 small yellow onion, diced
* 2 zucchini, halved lengthwise and slices
* 1.5 jars spaghetti sauce (We used Trader Joes Arrabiata)
* about 16 oz whole wheat bowtie pasta
* 1 lb spicy chicken or turkey sausage
* olive oil
* salt and pepper

Directions
1. Preheat oven to 400 degrees.
2. Line a baking sheet (or 2) with tin foil and place veggies on baking sheet.
3. Mist veggies with olive oil (or drizzle if you don't have an olive oil spray thing) and then sprinkle with salt and pepper.
4. Put baking sheets in oven and cook until vegetables are tender, about 30 min.
5. While they are cooking, bring a large pot of water to a boil and cook pasta according to directions on the box.
6. While the pasta is cooking, remove casing from sausage and cook over medium heat, stirring to crumble until sausage is not longer pink.
7. When pasta is done, drain and return to pot.
8. Add spaghetti sauce, roasted vegetables, and turkey sausage to pot and stir to combine.
9. Season with salt and pepper.
10. Serve in individual bowls and sprinkle with Parmesan cheese.
Serves 6-8 people.

Thursday, December 10, 2009

Stuffed Acorn Squash


Tonight we had stuffed acorn squash for dinner- I loved it! Nick really liked it too, but I don't think he could like it more than me! It was a very fall/wintery dinner, which was perfect for this cold day.

Ingredients:
1 acorn squash
1/2 cup brown rice (or about 1 cup cooked)
1/4 cup craisins (or raisins)
1 link of spicy turkey or chicken sausage
1/4 cup crumbled goat cheese
salt and pepper
2 Tbsp chopped walnuts, toasted

Directions:
1. Preheat oven to 400 degrees.
2. Cut squash in half, crosswise (or on the "equator" according to nick) and remove seeds.
3. Put about half an inch of water in a baking dish and place squash cut-side-down.
4. Cook in oven until tender, about 40 minutes.
5. While squash is roasting, cook rice according to package directions.
6. Remove casing from sausage and cook in a nonstick skillet over medium heat, stirring to crumble.
7. In a medium bowl, combine cooked rice, cooked turkey sausage, craisins, walnuts, and goat cheese. Season with salt and pepper.
8. Spoon rice mixture into squash.
(Serves 2, one squash half for each)

Sunday, December 6, 2009

Banana Espresso Chocolate Chip Muffins


My freezer is stocked full with frozen bananas that were "past their prime" for eating, but they are perfect for baking! I saw these muffins on Culinary Concoctions by Peabody, which is a blog I love to read because she makes so many delicious desserts. Her recipes have never let me down and this time was no exception! They were really good and had just a hint of the espresso taste. I will definitely make these again!

Banana Espresso Chocolate Chip Muffins

1 ½ cups mashed, very ripe bananas
½ cup granulated sugar
½ cup firmly packed light brown sugar
½ cup unsalted butter, melted
¼ cup 2% milk
1 large egg
1/3 cup cream cheese, at room temperature
1 ½ cups all-purpose flour
½ tsp instant espresso powder
1 ½ tsp baking soda
1 tsp salt
1 cup semisweet chocolate chips

Preheat oven to 350F. Spray a 12 cup muffin pan with nonstick cooking spray.
In a medium bowl, stir together the bananas, sugars, butter, cream cheese, milk and egg.
In another medium bowl, whisk together the flour, instant espresso powder, baking soda, and salt. Make a well in the middle of the dry ingredients. Pour the wet ingredients into the well and stir until just combined. Fold in the chocolate chips.
Fill each sup about three-quarters full. Bake in the center of the oven for 20-25 minutes, until a toothpick inserted in the center of a muffin comes out clean.
Move the muffin pan to a cooling rack, and let cool for 15 minutes. After 15 minutes, remove the muffins from the pan and let them finish cooling on the cooling rack.

Sunday, November 29, 2009

Roasted Eggplant Sandwiches

I was trying to think of something to do with the eggplant that we had left over from the roasted eggplant towers and decided to make some sandwiches. I was really surprised at how good they turned out! I think I said about three times during dinner how much I liked them. Nick liked them too- I had made him one chicken sandwich and one eggplant, and he actually liked the eggplant better! I will definitely be making these again in the future for a quick, casual dinner.

Ingredients-
Whole wheat bread (I recommend using the bread from a bakery rather than typical sandwich bread)
Roasted red pepper, sliced (I roasted ours, but you can buy the jarred kind to save time if you want)
Roasted eggplant slices (See this post on roasting eggplant)
Pesto
Olive oil mayo (or light mayo)
Tomato, sliced
Crumbled goat cheese

Directions:
1. Preheat broiler.
2. Toast bread in a toaster or under the broiler.
3. Spread a thin layer of mayo on one slice of bread
4. Spread a layer of pesto on top of the mayo.
5. Place slices of eggplant, followed by roasted red peppers, and tomatoes on the bread.
5. Sprinkle goat cheese on top of tomatoes.
6. Place sandwiches (open faced) under the broiler to slightly melt the cheese.
7. Remove from oven and top with second piece of bread.

Monday, November 23, 2009

Roasted Eggplant Towers


Tonight's dinner was just kind of a "create as I go" type dinner, but it turned out pretty well! I knew I would like it going in because it involved 3 of my favorite things: spaghetti squash, marinara, and broccoli. I don't know why, but I had been wanting to try eggplant for a while now. I decided that roasting it was the way to go. I don't really know that I did it right because I think there is some sort of process to get the excess water out, but I just guessed. It seemed fine to me, but maybe it could have been better- I don't know?? Anyway, Nick and I both really liked it, and it was very healthy since it was pretty much all vegetables!


Ingredients:
1 spaghetti squash
1 bunch of broccoli
1 medium eggplant
2-3 Tbsp olive oil
1 cup of marinara (I used Trader Joe's Arrabiata sauce- I was very impressed with it)
Shredded or shaved Parmesan
salt and pepper

Directions:
1. Line a baking sheet with paper towels.
2. Slice the eggplant crosswise into half inch slices.
3. Place slices of eggplant in a single layer and sprinkle with salt.
4. Place another layer of paper towels on top, pressing down lightly. Let sit for about 20 minutes. Then, with a dry paper towel, blot to pick up any remaining moisture.
5. Preheat oven to 375.
6. Cut broccoli into florets, toss with 1 Tbsp of olive oil, and sprinkle with salt and pepper.
7. Brush eggplant with 1-2 Tbsp olive oil, and sprinkle with salt and pepper.
8. Put eggplant and broccoli in oven to roast. It will probably take 25-35 minutes, but you will want to check and take them out when they are tender.
9. Cook spaghetti squash according to these directions (but without the tomatoes).
10. Once everything is cooked, assemble each plate with a pile of spaghetti squash, 3 slices of eggplant with marinara poured over each layer, and then add the broccoli. Sprinkle with Parmesan.

Monday, October 26, 2009

Stuffed Peppers

I think the last time I had a stuffed pepper had to have been in the early 90's. Do people even make these anymore??? I am not really sure what made me want to make these, but they were really good and healthy "comfort" food! I found the recipe on Simply Recipes and only made a couple small changes.

Ingredients

* 6 bell peppers (I used a variety of colors)
* 1/2 Tbsp extra-virgin olive oil
* 1 medium yellow onion, peeled and chopped
* 1 clove of garlic, peeled and chopped
* 3/4 lb of 96% lean ground beef
* 1/4 lb of lean ground turkey (you could use all beef or all turkey if you want)
* 1 1/2 cup of cooked brown rice
* 1 can diced tomatoes with oregano and garlic, drained
* 1 tsp of dried oregano
* Fresh ground pepper
* Salt
* 1/2 cup ketchup
* 1/2 tsp of Worcestershire Sauce
* Dash of Tabasco sauce

Directions

1. Bring a large pot of water to a boil over high heat. Meanwhile, cut top off peppers 1 inch from the stem end, and remove seeds. Then add peppers to the water and boil, keeping peppers completely submerged, until their flesh slightly softened, about 3 minutes. Drain, set aside to cool.

2. Preheat oven to 350 degrees F. Heat 1/2 tbsp of the oil in a large skillet over medium heat. Add onions and garlic, and cook, stirring often, until soft and translucent, about 5 minutes. Remove skillet from heat, add meat, rice, tomatoes, and oregano, and season generously with salt and pepper. Mix well.

3. Arrange peppers cut side up in a baking dish, then stuff peppers with filling. Combine ketchup, Worcestershire sauce, Tabasco sauce, and 1/4 cup of water in a small bowl, then spoon over filling. Add 1/4 cup of water to the baking dish. Place in oven and bake for 40-50 minutes (or longer, depending on how big the peppers are that you are stuffing), until the internal temperature of the stuffed pepper is 150-160°F.

Sunday, October 25, 2009

Snickers Blondies

I made these blondies for Dub's birthday, which was actually a couple weeks ago but I was a little late in making them (thanks CPA exam)! I chose to make these because bars are easy to transport/give as gifts, and Dub loves candy so I added some Snickers to the batter. I made one pan to give away and then a half pan to keep so that we got to try them too :) I was quite pleased with them- definitely my favorite of all the blondies recipes that I had tried previously! I am pretty sure that Nick, Matt, Blake, and Nat liked them too... Unfortunately they went so fast that I didn't get a very good picture! So, keep in mind that this picture really doesn't do them justice!


Snickers Blondies (adapted from 3B's Toffee Blondies)

Ingredients:
2 cups all-purpose flour
1 tsp baking powder
1/4 tsp baking soda
1 tsp salt
2 c brown sugar (I used 1 cup light brown sugar and 1 cup dark brown)
2 sticks melted unsalted butter
2 large eggs
1/2 tsp vanilla
4 Snickers bars, chopped

Directions:
1. Preheat oven to 350 degrees.
2. Into a large mixing bowl, mix together: all-purpose flour,baking powder, baking soda, and salt.
3. In a second bowl, beat together brown sugar with melted butter.
4. Add egg and vanilla to butter/sugar mixture and mix well.
5. Stir the flour mixture into the butter mixture.
6. Fold in the chopped Snickers bars.
7. Spray a 9x13 pan with Pam for Baking.
8. Pour batter into prepared pan and bake for 20-25 minutes. This time is approximate because I used an 8x8 pan and a 4x8 pan rather than one large pan so make sure you watch it- it is done when a toothpick can be inserted and comes out clean.

Sunday, October 4, 2009

Arugula Salad

A couple weeks ago, I saw a segment on the Today show where they made flank steak with tomato jam and an arugula salad. It looked delicious, and we hadn't had steak in a while so I decided to make it the next night. I had really high expectations for this because it just looked so good on tv! I wasn't even sure that I liked arugula because I had only had it once before and thought it was just ok. Well, it turned out that the steak was just ok, and the arugula salad was delicious! Arugula has a slight peppery taste, and it went really well with this vinaigrette. The tomatoes and shaved Parmesan were also great additions.

Here is a link to the whole recipe, but the recipe for the salad is below:
• 1 bunch (about 5 1/2 cups) arugula
• 3 tablespoons extra virgin olive oil
• 2 1/2 teaspoons lemon juice
• 1 1/4 teaspoons balsamic vinegar
• Dash kosher salt
• Dash freshly ground black pepper
• 1/2 cup Regianno-Parmesan cheese, sliced thin
• 1 cup baby tomatoes, halved

Combine the olive oil, lemon juice, balsamic vinegar, salt and pepper. Add arugula, tomatoes, and cheese and toss well. (You may not need all the dressing so just add a little at a time to the arugula until it is dressed as you like)

Wednesday, September 30, 2009

Cornbread Salad


Yum! I made this salad a couple nights ago for dinner, and I really loved it! Of course, it helps that I love cornbread! I had seen this recipe before on Smitten Kitchen and thought it looked good, but it seemed like a lot of work for a salad- to have to make cornbread and the dressing rather than just cutting up some vegetables and putting them on a pile of lettuce with bottled dressing. But now I am so glad I tried it! I had already made cornbread earlier in the week using this recipe for Low Fat Cornbread so I wanted to use some of it for the salad. The recipe as I made it is below to serve 2 people. (I served it as a side with trout and mashed potatoes).

Ingredients:
Salad-
1.5-2 cups cornbread, cut into small cubes (mine were more rectangular...)
1 cup baby heirloom tomatoes, halved (You can use any kind of good ripe tomatoes)
1/4 Vidalia onion, very thinly sliced
mixed greens
dressing (see recipe below)

Directions:
1. Turn on broiler (low setting if you have it)
2. Spread cornbread in a single layer on a baking sheet
3. Broil until bread cubes are toasted (mine took about 4 minutes, but you will want to keep an eye on this)
4. Place lettuce, greens,toasted corn bread, onion and tomatoes to a large bowl and toss to combine. Drizzle with buttermilk dressing, season with salt and pepper, and toss again. Serve immediately.

Buttermilk Lime Dressing:
1/2 cup lowfat buttermilk
2 tablespoons freshly squeezed lime juice
1 tablespoon good quality olive oil
1/2 tablespoon apple cider vinegar
1/2 tablespoon honey
2 tablespoons finely minced fresh basil
2 tablespoons finely minced fresh flat-leaf parsley
2 tablespoons finely minced green onions
salt and pepper

Whisk all of the ingredients together in a small bowl until combined. Can covered tightly and stored in the fridge up to two days. You probably will not need all the dressing- depending on how much you like on your salad.

Monday, September 28, 2009

Roasted carrots with avocado

I actually made this side dish a while ago, but then I came across the picture and realized I had never added it to the blog! I want to immediately because it was so good, and I wanted to remind myself to make it again soon! I read the recipe for Roasted Carrot and Avocado salad on Smitten Kitchen, one of my favorites and knew I wanted to try it or something similar. I had forgotten how good roasted carrots are!

I made a few changes from the original recipe. First, I reduced the oil because I really didn't think it needed much. Second, as much as I love cumin, I left it out because I just wanted to taste the pure sweetness of the carrots. The recipe as I made it is below:
Ingredients:
- 1 lb carrots, peeled and sliced into 2 inch pieces (I used organic but you don't have to)
-1/2 to 1 Tbsp olive oil
- salt and pepper
- 1/4 avocado, sliced

Directions:
1. Preheat oven to 400 degrees
2. Toss carrots with olive oil (or spray if you have an olive oil spray can) on baking sheet
3. Sprinkle carrots with salt and pepper
4. Roast in the oven for about 20-25 minutes. You will want to check yours because time will vary based on the thickness of the carrots. They are done when they are fork tender, but not mushy.
5. Toss carrots with avocado slices and serve.

I would say this probably serves 3-4 people, but we had no problem finishing it off with just 2 of us!

Thursday, August 27, 2009

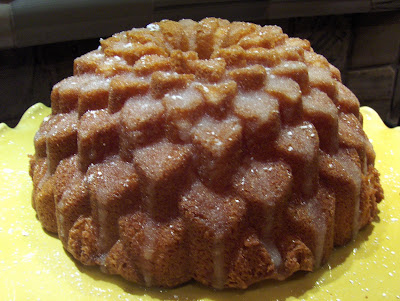
Lime Pound Cake


After the "fiesta" for Cath and Trone, we had A LOT of limes left over. And I had cut them all up. Don't ask my why I thought we needed so many lime slices for Corona and margaritas. Anyway, I wanted to find something to do with them so we didn't have to throw them all away, and I found this recipe for Key Lime Cream Cheese Pound Cake. This was a great recipe as long as you don't make it harder than it has to be... Sliced limes are much harder to zest and juice than whole limes. If you find your self in a situation with sliced limes, I say toss them and splurge on the whole limes at 44 cents each! Also, when I started to make the cake, I realized that I forgot to set out the butter and cream cheese. So, I had the genius idea to put them in the warming drawer to speed up the process. This was a genius idea until I left it in for too long and had a pool of butter to clean up. At least not all of it melted so I just guessed and added a couple more tablespoons. Needless to say, the measurements weren't completely accurate, but it still turned out great!

It had a great texture and was not too dense (a problem I tend to have trouble with when baking pound cakes). The cake itself has a hint of lime, but it is not overwhelming, and the glaze provides a great sweet and tart flavor to complement the cake. I definitely recommend not skipping the glaze. I made a couple minor changes to the original and used fresh juice rather than bottled and reduced fat cream cheese. Also, I think my pan must have been smaller because I reduced the cooking time by 15 minutes. So, once it has been in for an hour, I would start checking it for "doneness." The recipe as I made it is below:
Ingredients:
For the Pound Cake:
3 1/4 cups cake flour
1/4 tsp. baking soda
1/4 tsp. salt
2 1/4 sticks
8 oz. reduced fat cream cheese
3 cups granulated sugar
6 large eggs
1 tsp. pure vanilla extract
3 tbsp. lime juice
2 tsp. very finely grated lime zest
Confectioners' sugar for garnish

For the Glaze:
3/4 cup granulated sugar
1/4 cup Key Lime Juice

Instructions:
Have all ingredients at room temperature. Position oven rack in lower third of oven and preheat to 325 degrees F. Grease and flour a 9 or 10-inch bundt pan.

Sift together flour, baking soda and salt, set aside.

With an electric mixer, fitted with a flat beater, beat butter and cream cheese at medium speed until creamy and smooth, about 30-40 seconds. Add 3 cups of the sugar and beat until light and fluffy, about 5 minutes, stop mixer and scrape bowl occasionally. Add eggs, 1 at a time, beating well after each addition. Beat in vanilla and 3 tbsp. lime juice. Reduce speed to low. Fold in flour, baking soda, and salt mixture in 3 additions, blending each addition just until smooth, stop mixer and scrape bowl occasionally. Fold in lime zest.

Spoon batter into prepared pan. Bake until cake is golden, and a toothpick inserted into center comes out clean, about 1 1/2 hours. Cool upright in pan on rack for 10 minutes. Invert cake onto cooling rack with waxed or parchment paper placed underneath rack, and glaze. Place cake on serving plate, and dust with powdered sugar.

Makes 12-16 servings.

Key Lime Glaze:

In a small bowl, whisk 1/4 cup key lime juice and 3/4 cup sugar until blended. Set rack over a sheet of waxed paper, invert cake onto rack. Generously brush cake with glaze. After glaze has set; approximately 10 minutes, lightly sprinkle cake with powdered sugar.

Sunday, August 23, 2009

Sopapilla Cheesecake Bars


So, it has been a while since I blogged, but I have a few recipes to post to catch up! The first is sopapilla cheesecake bars. Last night, we had a wedding shower for Cath and Trone- it was fiesta themed so I wanted to put a little bit of a Mexican spin on the desserts! I came across this recipe from AllRecipes.com and thought it would be perfect for the occasion. Also, they had such good reviews that I figured they would be a safe decision.
They turned out great! They definitely aren't the most healthy option, which became clear as I was pouring half a cup of butter over them... But apparently they were a crowd pleaser because there was only one left at the end of the night (which got eaten quickly the next day...)! I made 2 small modifications to the original recipe by leaving out the almonds and I replaced 1 package of regular cream cheese with reduced fat (healthy, right?!?) The recipe as I made it is below:

INGREDIENTS

* 2 (8 ounce) packages cream cheese, softened
* 1 (8 ounce) package reduced fat cream cheese, softened
* 1 1/2 cups white sugar
* 1 1/2 teaspoons vanilla extract
* 2 (8 ounce) cans crescent roll dough

* 1/2 cup melted butter
* 1/2 cup white sugar
* 1 teaspoon ground cinnamon

DIRECTIONS

1. Preheat an oven to 350 degrees F .
2. Beat the cream cheese with 1 1/2 cups of sugar, and the vanilla extract in a bowl until smooth. Unroll the cans of crescent roll dough, and use a rolling pin to shape the each piece into 9x13 inch rectangles. Press one piece into the bottom of a 9x13 inch baking dish. Evenly spread the cream cheese mixture into the baking dish, then cover with the remaining piece of crescent dough.
3. Drizzle the melted butter evenly over the top of the cheesecake. Stir the remaining 1/2 cup of sugar together with the cinnamon in a small bowl, and sprinkle over the cheesecake.
4. Bake in the preheated oven until the crescent dough has puffed and turned golden brown, about 45 minutes. Cool completely in the pan before cutting into 12 squares. (I refrigerated them overnight before cutting so they were really easy to cut cleanly).

Tuesday, June 30, 2009

Easy Banana Puddin'


Last night Matt came over as our dinner guest! We had a good time and devoured some paella. Then, for dessert we had some banana pudding. This was a really easy recipe that I found on All Recipes. I wanted to make it because Publix's version of Nilla wafers were the penny item a couple weeks ago, and what do you do with Nilla wafers?? You make banana pudding! No other options!
Nick and Matt eating their pudding

Matt sporting the Chicken on the Green apron

I pretty much followed the recipe as written but did substitute for a couple of lower fat things. You can find the original here. The recipe with my changes is below:
Ingredients:
* 1 (8 ounce) package reduced fat cream cheese
* 1 (14 ounce) can sweetened condensed milk
* 1 (5 ounce) package instant vanilla pudding mix
* 3 cups cold milk (I used 2%)
* 1 teaspoon vanilla extract
* 1 (8 ounce) container lite frozen whipped topping, thawed
* 4 bananas, sliced
* 1/2 (12 ounce) package vanilla wafers
Direction:
1. In a large bowl, beat cream cheese until fluffy. Beat in condensed milk, pudding mix, cold milk and vanilla until smooth. Fold in 1/2 of the whipped topping.
2. Line the bottom of a 9x13 inch dish with vanilla wafers. Arrange sliced bananas evenly over wafers. Spread with pudding mixture. Top with remaining whipped topping. Chill.

Saturday, June 20, 2009

Chicken Gyros

Last night, Nick and I tried something new for dinner- Chicken Gyros! I had seen them on a few different blogs lately (Annie's Eats, Elly says Opa, and Lovestoeat's Weblog), and everyone seemed to like them so I thought we would give them a try! They did turn out well! (By the way, see this post for the pronunciation key :) ) My pictures don't really do them justice, but you get the point.

Also, they were normal sized, but I think they look miniature in comparison to Nick's hand.


For the tzatziki sauce
Ingredients:
16 oz. nonfat greek yogurt (you don't have to use nonfat)
1/2 hothouse cucumber or 1 regular cucumber, peeled and seeded
2 cloves garlic, or finely minced (I kind of wished that I had only used 1 but its up to you)
1 tsp. white wine vinegar
Salt and pepper
Squeeze of fresh lemon juice
Extra virgin olive oil

Directions:
1. Shred the cucumber, and then drain the water off. (I did this by putting the cucumber over a very fine strainer and pressing to release the water. I read that you can also wrap it in a towel and squeeze to remove the water).
2. Mix together the yogurt, shredded cucumber, garlic, white wine vinegar, salt and pepper to taste, and lemon juice. Drizzle lightly with olive oil.
3. Refrigerate for at least 30 minutes before serving to allow the flavors to meld.


For the Chicken
Ingredients:
4 cloves garlic, smashed
Juice of 1 lemon
2 tsp. red wine vinegar
2 tbsp. extra virgin olive oil
2 heaping tbsp. plain yogurt
1 tbsp. dried oregano
Salt and pepper
1 1/4 lbs. chicken pieces (I used chicken tenders and cut them into thirds)

Other ingredients:
Pitas (I think the softer they are the better)
Diced tomato
Thinly sliced onion

Directions:
1.Combine the garlic, lemon juice, red wine vinegar, olive oil, yogurt, oregano, and salt and pepper to taste in a medium bowl. Whisk together until mixed well.
2. Add the chicken pieces to the bowl and mix well to coat. Cover and refrigerate for about 1 hour.
3. Cook the chicken as desired, either in the skillet or with the broiler. (We broiled them for about 15 minutes, but it will vary depending on your oven and the size of your chicken pieces)
4. Once the chicken is completely cooked through, transfer to a plate and let rest for 5 minutes.
6.Heat pitas.
7. Top with chicken, tzatziki sauce, diced tomatoes and sliced onions.
8. Serve immediately.

Thursday, June 18, 2009

Chocolate Chip Pie


I was searching for a recipe to use my 2nd frozen pie crust and came across this one on All Recipes. It looked simple to make, had gotten 5 star reviews, and I had all the ingredients on hand- it sounded perfect! It came together in no time, and it was really good! It tasted like a big chocolate chip cookie! We tried it both warm and at room temperature and both preferred it at room temperature. When it is warm, the chips are all melty, which is good, but it tastes more like a chocolate pie. At room temp, it tastes like a cookie. So try it both ways and see how you like it! I followed the recipe with the exception of using half brown sugar and half white, so just click on the link above to get it!

Wednesday, June 3, 2009

Couscous with Shrimp and Roasted Okra


Last week, I bought some fresh okra at at road-side vegetable stand. I didn't really know what I was going to do with it (and I never buy things without already knowing what I am making), but I like okra so I bought it. So, this whole meal was centered around this okra I had bought. When I started making it, I wasn't even excited about it and definitely didn't plan on adding it to the blog. But after we started eating, we both decided it was good and so we stopped to get a photo so we could add it! Also,it came together quickly (less than 30 minutes for us is good :) ) so it makes a good weeknight meal.

Ingredients:
1 box Near East wheat couscous w/roasted garlic and olive oil
1 cup cherry tomatoes, halved
2 cups fresh okra, cut into 1/2 inch slices
1/4 viladia onion, diced
3/4 lb shrimp, peeled and deveined
olive oil
salt and pepper
old bay seasoning

Directions:
1. Preheat oven to 375 degrees
2. Combine okra, tomatoes, and onions on a baking sheet lined with non-stick aluminum foil. (This is not necessary but helpful). Toss with 2 tsp olive oil and sprinkle with salt and pepper.
3. Place the baking sheet with vegetables in oven and cook for about 20 minutes or until done.
4. While vegetables are roasting, prepare cous cous according to package directions omitting butter/olive oil.
5. Also while veggies are roasting, heat a large skillet over medium heat with 1-2 tsp olive oil. Add shrimp to pan and sprinkle with salt, pepper, and old bay seasoning. Cook until they turn pink and are opaque, flipping half way. (Our shrimp were medium sized and took 1-2 min per side)
6.To assemble the dish, place a small pile of couscous in the middle of the plate and top with shrimp and veggies.

Monday, June 1, 2009

California Breakfast Sandwiches


Breakfast for dinner is one of my favorite nights because it is fun to experiment with breakfast foods that I normally wouldn't take to the time to try in the morning. This sandwich is one of my favorites- maybe it is just the avocado kick I am on lately. Oh well, it doesn't matter- they were good and Nick liked them too! It was a great combination to have the richness of the egg, saltiness of the Canadian bacon, and freshness of the tomato and avocado all captured between a toasty English muffin!

Ingredients (for 1 sandwich):
whole wheat English muffin
slice of ripe tomato
1 piece of Canadian bacon
1/4 ripe avocado, sliced
1 egg
salt & pepper

Directions:
1. Preheat broiler
2. Slice English muffin in half
3. Place tomato slice on one half, and sprinkle with salt.
4. Heat a non stick skillet with cooking spray over medium heat.
5. Place both halves of English muffin under broiler and broil until one side is slightly toasted and tomato begins to cook. Keep an eye on it so it doesn't burn!
6. While it is broiling, cook Canadian bacon in pan flipping half way until both sides are slightly browned or bacon is warmed throughout.
7. Cook egg in the same skillet flipping half way until done, but with the yolk still runny. (That's how I like it, but you could cook it any way you prefer).
8. Assemble sandwich. Place Canadian bacon on tomato, egg on top of that, and avocado on the other half, and put it all together!

Saturday, May 30, 2009

Pecan Pie


I am way behind on my blog posting so I apologize to my few faithful readers :) Anyway, for mother's day, Uncle Scott requested that I make a pecan pie. I was happy to oblige because pecan pies have to be the easiest dessert to make, and I found this recipe from Southern Living a few years ago, and everyone seems to love it! Now, I will go ahead and admit that I don't make my own pie crust, but that would take the "easy" out of this recipe :) And I think Pillsbury does a fine job. So, if you need an easy, crowd-pleasing dessert, try this pecan pie!

Saturday, May 9, 2009

Grilled Chicken Cobb Salad

So, I have been on an avocado kick lately. I used to not care for it much. It was a "take it or leave it" type thing, but recently it has officially moved to the "take it" side only! So, all that to say that I really wanted a Cobb salad because of the avocado. It was really delicious, and I love the way all the different components taste together. Also, on mine, I used turkey bacon instead of regular, and I really liked that substitution. I ate it with this delicious blue cheese yogurt dressing, but Nick preferred it with ranch so you can eat it with whatever you have.

Makes 2 large salads:
Ingredients-
- 1 bag of romaine salad mix
- 2 grilled chicken breasts (or you could use a rotisserie chicken)
- 1/2 avocado, sliced
- 2-3 strips of bacon (or turkey bacon)
- 1 hard boiled egg
- 1 cup cherry or grape tomatoes, halved
- blue cheese to sprinkle on top

Directions:
1. Divide romaine between plates or bowls.
2. Add grilled chicken, avocado, bacon, egg, tomatoes on top of lettuce.
3. Sprinkle with blue cheese,
4. Serve with whatever kind of dressing you want :)

Tuesday, April 28, 2009

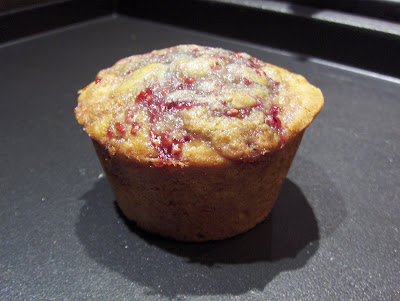
Raspberry Cream Cheese Muffins


I saw a recipe for these Raspberry Cream Cheese Buns on Bake or Break. They looked so good and got such a good review that I had to put them on my never ending list of "things to make." I had some cream cheese left over that needed to be used so they quickly worked their way to the top! Nick and I both liked them a lot. I made some with raspberry jam and some with strawberry so you can use whatever kind you want, but I liked the raspberry best! The muffins were sweet, but not too sweet and had a good crumb and texture. I think that it would be a good base recipe for other muffins too (like blueberry or lemon).

I didn't change the recipe at all so you can just use the links above if you want to make them!

Wednesday, April 22, 2009

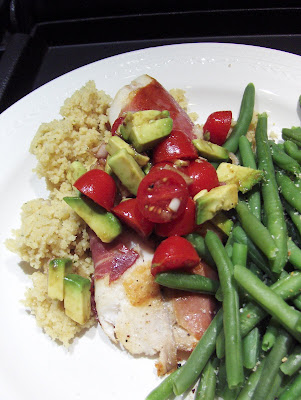
Prosciutto Wrapped Tilapia

This is a fairly quick and simple dinner, but it is also delicious! I had wanted to make fish wrapped in prosciutto for awhile now, so I finally did and chose to make it with tilapia because it is a mild-flavored fish (and also budget friendly!) The prosciutto gave it a nice salty flavor and crispy texture contrast to the delicate fish. I made a tomato and avacado salsa to top the fish which tied it all together well. We both liked it and will be making this again!


Ingredients:
(For fish)
- 2 tilapia filets
- 2 pieces of thinly slice prosciutto
- salt and pepper
- 1 tsp olive oil

(For tomato and avocado salad)
- 1/2 Haas avocado, cubed
- about 10 grape tomatoes, halved
- 1 shallot, finely diced
- 1 tsp balsamic vinegar
- 1/2 tsp lemon juice
- salt and pepper

Directions:
1. Combine all salsa ingredients in a small bowl and gently toss to combine
2. Sprinkle both sides of tilapia with salt and pepper.
3. Wrap each piece of tilapia with proscuitto.
4. Heat about 1 tsp olive oil in a pan over medium heat.
5. Once pan is heated, add fish and cook through, flipping half way (fish should flake easily with a fork on both sides when done)

Tuesday, April 21, 2009

Roasted Vegetable Salad

On Sunday night we ate dinner at California Pizza Kitchen and had a roasted vegetable salad to go with our pizza. It was really good so I wanted to re-create it for dinner tonight. It was so easy to make, and it is so versatile because you can use whatever vegetables you want! I had a bed of romaine topped with roasted asparagus, squash, red pepper, onion, corn, and crumbled goat cheese. It was delicious served with a light balsamic vinaigrette.

There is no real "recipe" for this. Just toss your vegetables with a little olive oil, sprinkle with salt and pepper, and roast in the oven until done (mine were done in about 15 min in a 400 degree oven). Then, throw them on top of your lettuce!

Wednesday, April 15, 2009

Strawberry Cake

For mom's birthday, I made her a strawberry cake- not just any strawberry cake, but the recipe my granny was using to make a cake the day she had my mom! Now, it does use cake mix and jello, but it has the addition of fresh strawberries, pecans, and coconut so you would never guess that it starts with cake mix. And it is topped with a strawberry cream cheese frosting- delicious! Everyone really seemed to like it! You can find the recipe here.


Here is a pic of Steve and me with the dinner we cooked.

Tuesday, April 14, 2009

Goat Cheese and Roasted Corn Quesadillas

"This is a winner!" Nick commented on tonight's dinner, and I agree! Quesadillas aren't normally the type of thing I would cook for dinner, but I love goat cheese and thought it would be good to branch out a little. I am glad I did! The goat cheese is tangy and balanced out nicely by the sweetness of the roasted corn. I found the original recipe in Cooking Light, but changed it a little so my version (which serves 3) is below. I served it with a side salad and black beans. Oh, and Nick had chicken in his (he really liked, but I don't think it needed it!)


Ingredients:
- 3 oz goat cheese, softened to room temp
- 3 Tbsp milk (I used 2%)
- 3/4 cup frozen corn kernals
- 1/4 cup sliced green onions
- Salsa (I used Tostito's Medium)
- 3 10" Wheat Wrap/Tortilla (I used Tofuyan)

Directions:
1. Once goat cheese has softened, put in a bowl with milk and beat with hand mixer until smooth.
2. Heat skillet (lightly coated with cooking spray or olive oil spray) over medium heat.
3. Saute corn until it starts to brown. Remove from heat and stir into goat cheese.
4. Spread goat cheese and corn mixture onto one half of each tortilla.
5. Sprinkle each with green onions and dabs of salsa (dabs is a technical term here!)
6. Fold empty side tortilla over cheese side.
7. Heat skillet (lightly coated with cooking spray or olive oil spray) over medium heat.
8. Cook each quesadilla until golden brown on both sides.

Saturday, April 11, 2009

Mediterranean Salmon

I made this Mediterranean Salmon on my trip to the beach with mom, Meggy, and Nat! I have made it a few times before and haven't gotten any bad reviews yet:) It is easy to make and doesn't take much time so it is even a good for a weeknight. The recipe is from Southern Living, but it is from the "Healthy" section and really is good for you! I pretty much follow the recipe, but I do make a few minor changes- reduce amount of olives, reduce oil, and broil the salmon. The recipe with these 3 adaptions is below. And, it is great served over roasted asparagus...yummmm.

Ingredients
* 1 medium onion, coarsely chopped
* 1/2 tablespoon olive oil
* 1 (15-oz.) can cannellini beans, rinsed and drained
* 1/4 cup chopped black olives
* 1 cup halved grape tomatoes
* 2 tablespoons chopped fresh basil
* 4 (6-oz.) salmon fillets
* 1/2 teaspoon salt
* 1/2 teaspoon pepper
Directions:
1. Sauté onion in 1/2 Tbsp. hot oil in a saucepan over medium heat 2 minutes or until slightly softened. Add beans, olives, and tomatoes; cook over medium heat, stirring occasionally, 2 minutes or until thoroughly heated. Remove from heat, and stir in basil.

2. Sprinkle salmon fillets evenly with salt and pepper. Broil in oven until cooked through and fish flakes easily with a fork. It took about 8-10 for me, but it will depend on the thickness of the salmon fillets.

Sunday, April 5, 2009

Blackberry Cheesecake Bars

Before I went on vacation, I wanted to make Nick a treat to compensate for the the fact that I was going to the beach while he was stuck working:) (I am sure he thought that was a fair exchange as well!) I didn't have much time so I picked a recipe for cheesecake bars that I found here because 1) I wouldn't have to buy much, 2) It was quick and easy to make, 3) He likes cheesecake. The recipe is for strawberry cheesecake bars, but we had blackberry preserves so that is what I made- you could use any kind you want though and they would be delicious! You can also halve the recipe and bake it in a loaf pan if you want.

Ingredients:
1 ¼ cups graham crumbs
¼ cup butter, melted
2 (8 oz) packages cream cheese, softened at room temperature
3/4 cup sugar
1 1/2 Tbsp flour
3 tbsp of lemon juice
2 eggs
1/3 cup blackberry preserves

Directions:
1. Preheat oven to 325ºF. Grease and line an 8” x 8” square baking with parchment paper or nonstick foil (for easy removing you slices later)
2. Mix crumbs and butter together and press firmly into bottom of the pan. Set it aside.
3. Beat cream cheese, sugar, flour and lemon juice in large bowl with electric mixer on medium speed until well blended. Add eggs, one at a time, beating on low speed after each addition, just until blended.
4. Pour cream cheese mixture over crust.
5. Heat blackberry preserves slightly in the microwave (like 15 seconds). Gently drop preserves by small spoonfuls over top of batter. Use a knife and drag it through preserves and cheesecake batter to swirl.
5. Bake approx 40 min. or until center is set. Cool. Refrigerate at least 2 hours or overnight before cutting it.

Friday, April 3, 2009

Strawberry Chantilly Cake

Happy Birthday to Meggo, Happy Birthday to Meggo!! Today she turns 25! For Meg's Bday, I made a Strawberry Chantilly cake about a month ago (before I left Wichita). She seemed to like it because she was very particular about who she would share with :) The actual cake isn't that hard to make, but make sure you spray your cake pans with a baking spray with flour! I forgot to do this, and it was a disaster- that is why Meg ended up with a three layer half cake rather than a whole two-layer cake. Anyway, on to the actual cake...the cake itself is a fluffy white cake with a sweetened whipped cream and fresh strawberries in between the layers. The cake has a light texture to it and is complemented well by the not-too-sweet chantilly cream and strawberries.


For the Cake (recipe adapted from Cooks Illustrated):
Ingredients-
Nonstick cooking spray with flour
2¼ cups cake flour (9 ounces)
1 cup whole milk, at room temperature
6 large egg whites, at room temperature
3 teaspoons vanilla extract
1¾ cups granulated sugar (12¼ ounces)
4 teaspoons baking powder
1 teaspoon table salt
12 tablespoons unsalted butter (1½ sticks), softened

Directions:
1. Heat oven to 350 degrees. Spray two 9-inch round cake pans with nonstick cooking spray; line the bottoms with parchment or waxed paper rounds. Spray the paper rounds with cooking spray
2. Pour milk, egg whites, and extracts into 2-cup glass measure, and mix with fork until blended.
3. Mix cake flour, sugar, baking powder, and salt in bowl of electric mixer at slow speed. Add butter; continue beating at slow speed until mixture resembles moist crumbs.
4. Add all but ½ cup of milk mixture to crumbs and beat at medium speed (or high speed if using handheld mixer) for 1½ minutes. Add remaining ½ cup of milk mixture and beat 30 seconds more. Stop mixer and scrape sides of bowl. Return mixer to medium (or high) speed and beat 20 seconds longer.
5. Divide batter evenly between two prepared cake pans, spreading evenly with a rubber spatula. Bake until thin skewer or toothpick inserted in the center comes out clean, 23 to 25 minutes.
6. Let cakes rest in pans for 5 minutes. Loosen from sides of pans with a knife, if necessary, and invert onto wire racks.

For the Chantilly Cream:
Ingredients-
- 2 cups heavy whipping cream
- 3 Tbsp powdered sugar
- 2 tsps vanilla extract

Directions-
Combine all ingredients in a chilled bowl and whip just until stiff peaks form but not too long because you don't want it to be over-whipped!

Strawberries:
1. Wash strawberries and pat dry with paper towel.
2. Remove stems and slice lengthwise.


To assemble cake:
1. Once cake has cooled, place one layer on cake stand or plate.
2. Cover with Chantilly cream, place fresh sliced strawberries on top of cream covering the top of the cake.
3. Place second layer of cake on top and cover completely with Chantilly cream.
4. Smooth cream all around the cake and decorate top as desired.

Tuesday, March 24, 2009

Salmon with Herb Mustard Glaze

I made this salmon for Dad's birthday dinner, but I am just now getting around to posting it. I had made it several times before and decided I should stick to a "tried and true" recipe for the occasion rather than risking it with a new recipe! It is from Giada DeLaurentis on Food Network. She really has some great recipes, and this one has gotten a 5 star review from 222 reviewers so you know it has to be good! I followed the recipe exactly so I am just going post a link to it- you can find it here.

Monday, March 16, 2009

Very Crunchy Chocolate Chip Cookies


For Dad's Birthday (the big 6-0 !!), he requested crunchy chocolate chip cookies. Now, I am not a crunchy cookie person so I can't really relate to this desire, but apparently some (crazy) people do like crunchy cookies. So, to make them crunchy, I found a recipe that used all white sugar and had a high butter ratio because that's what makes them have that crunch. I am a big fan of the sweet/salty combo (and I think Dad is too) so when I took the cookies out, I sprinkled them with some Fleur de Sel (sea salt), which added some delicious saltiness. I can't wait to try it on some chewy chocolate chip cookies! So, if you like REALLY crunchy chocolate chip cookies, these may be for you. The original recipe can be found here, but my modified version is below.


Ingredients
* 2 cups all-purpose flour
* 1 teaspoon baking soda
* 1 teaspoon salt
* 1 cup butter, softened
* 1 1/2 cups white sugar
* 1 egg
* 1 teaspoon vanilla extract
* 1 1/2 cups semisweet chocolate chips
* 1/2 cup chopped walnuts
* Fleur de Sel, for sprinkling

DIRECTIONS

1. Preheat oven to 350 degrees F. Mix flour, baking soda and salt; set aside.
2. In a large bowl, cream together the butter and sugar until light and fluffy. Beat in the egg, then stir in the vanilla. Mix in the dry ingredients until well blended. Stir in the chocolate chips and walnuts. Drop dough by spoonfuls onto cookie sheet.
3. Bake for 12-14 minutes in the preheated oven (baking time will vary depending on size of cookies so watch first batch closely- they are done when the edges start to brown).
4. Remove cookies from oven and sprinkle with Fleur de Sel.