Thursday, December 30, 2010

Southwestern Chicken Soup

I LOVE making soup in the winter. It is just so hearty, warm, filling, and healthy! I make it pretty often (and by "pretty often" I mean Nick is probably sick and tired of it!), but I have so many recipes that I like such as this one and this one that I don't try all that many new ones. I am really glad I tried this one as it will probably go into the regular rotation :) It is slightly spicy from the jalepeno but not at all too hot (you could add more if you really want spicy), and the sweetness of corn was a great addition! It is also great for feeding a crowd. I tripled the recipe below for our community group, and I think everyone liked it :) The recipe is from Cooking Light, but I made a few changes which are reflected below. 
 Southwestern Chicken Soup (adapted from Cooking Light)
Serves 4
Ingredients: 
  • Cooking spray
  • 1  cup  diced onion
  • 2/3  cup diced green bell pepper
  • 2 cloves of garlic, minced
  • 1  jalapeño pepper, seeded and minced
  • 1  pound of chicken breast, cut into bite-sized pieces
  • 2  cups  fat-free, less-sodium chicken broth
  • 2  teaspoons  chili powder
  • 1  teaspoon  ground cumin
  • 1/2  teaspoon  salt
  • 1/4  teaspoon  black pepper
  • 1  (15-ounce) can pinto beans, rinsed and drained
  • 1  (14-ounce) can diced tomatoes, undrained
  • 1  cup  diced avocado
  • 1 cup of frozen sweet corn
Directions:
1. Heat a small nonstick Dutch oven over medium-heat. 
2. Coat pan with cooking spray or a little olive oil. 
3. Add onion, bell pepper, garlic, and jalapeño to pan; sauté for 2 minutes. 
4. Add chicken; cook 3-5 minutes. 
5. Add broth and next 6 ingredients (through tomatoes); bring to a boil. Partially cover, reduce heat, and simmer until chicken is done, stirring occasionally.
6. Add corn and cook until corn has thawed.
7. Remove from heat. 
8. Serve with avocado.

Monday, December 20, 2010

Tate's Bake Shop Sugar Cookies

Let's talk about sugar cookies. Christmas is really their season. While they are delicious any time of the year, I think the time they really shine is during the holidays because of all the pretty colored frosting and sprinkles. Most often though, it is the "cut out" sugar cookies rather than the "drop" kind that you see around. While the cut out ones are awfully pretty and festive, I feel like they just can't compare to the taste of the drop cookies, not-to-mention that they are definitely less time consuming. I think we can all agree that we could use a little extra time during Christmas! I know more hours in the day is definitely at the top of my wish list :) Now, these cookies in particular are something special. My decorating skills may be lacking, but these cookies definitely made up for that in taste! They had a great flavor and texture- soft and chewy on the inside and slightly crispy on the bottom. They will definitely be my "go-to" recipe in the future!
Old Fashioned Sugar Cookies (from Tate's Bake Shop Cookbook, seen on Smells like Home)
(Recipe yielded about 40 med-lg cookies) 
Ingredients:
  • 3 1/4 cups all-purpose flour
  • 1 tsp baking soda
  • 1 tsp baking powder
  • 1/4 tsp salt
  • 3/4 cup salted butter, room temperature
  • 2 cups sugar
  • 1 tbsp vanilla
  • 1 large egg
  • 1 cup sour cream
Directions:
  1. Preheat the oven to 350 degrees.
  2. Line cookie sheets with parchment paper. (You don't have to do this, but the bottoms came out more browned when I didn't)
  3. In a medium bowl, combine the flour, baking soda, baking powder, and salt.
  4. In a large bowl, cream the butter and sugar until the mixture is light and fluffy. 
  5. Add the vanilla and egg.  Mix together.
  6. Then, add the sour cream and mix it well.  
  7. Add the flour mixture and mix it until it is combined.
  8. Drop the cookies onto the prepared cookie sheets 2-3 inches apart as they do spread.
  9. Bake for 12-15 minutes or until they are light brown.  Cool them on the cookie sheets for about 5 minutes, and remove them to wire cooling racks to cool completely.
 For the Frosting:
Ingredients:
  • 1 cup (2 sticks) unsalted butter, at room temperature
  • 1 tsp vanilla extract
  • Pinch of salt
  • 4 cups confectioners’ sugar, sifted
  • 2 tbsp milk
  • Food coloring (optional)
Directions:
  1. Beat butter with a mixer for about 1 minute or until smooth.
  2. Add vanilla, salt, sugar, and milk and beat again until smooth.
  3. Add food coloring if you want and spread over cooled cookies. 

    Sunday, December 12, 2010

    Pear Salad with Maple Vinaigrette

    Making your own salad dressing is really quite simple and takes a salad from good to delicious! So often I rely on bottled salad dressing, but the extra 5 minutes it takes to make is really worth it- that is if you have an extra 5 minutes on that given day! I loved how the slight sweetness of the maple came through and also gave it a more seasonal flavor as maple really makes me think of the fall and winter. It was great on the pear salad, but I also used the leftovers through out the week on a salad with apples, which was equally delicious.

     Pear Salad with Maple Vinaigrette (from Taste of South magazine)
    Ingredients:
    For Salad:
    • Bibb lettuce (or any kind you prefer)
    • Pear
    • Dried cranberries
    • Blue cheese
    • Toasted walnuts
      For Dressing: 
    •  1/4 cup  maple syrup  
    •  1/4 cup  olive oil
    •  3 tablespoons  balsamic vinegar
    •  1 tablespoon  Dijon-style mustard
    •  1/4 teaspoon  ground black pepper
    •  1/8 teaspoon salt 
     Directions:
    1. Place handful or 2 of lettuce on each plate and top with pear, blue cheese, dried cranberries, and walnuts.
    2. Combine all dressing ingredients together in a bowl and drizzle on top of salad.  

    Saturday, December 4, 2010

    Pumpkin Polenta with Turkey Sausage and Greens

     Whenever I come across recipes with greens in them, I instantly think "Oh, delicious! I HAVE to make that," even when it is cooked spinach, which after several tries I am always disappointed in it and never learn my lesson! However, when I stumbled across Cara's Blog, I saw pumpkin polenta (delicious), turkey sausage (delicious), and swiss chard (hmmm- never had it but it sure looks delicious), I immediately knew I wanted to make it! I saw the swiss chard at the grocery store, but i chickened out and went with the safe choice of collard greens because I know I love those! Also, they come in a pre-cut and washed bag, which was a big selling point.

     
    Nick and I both loved this! The polenta was so creamy without adding any cream or butter, and the addition of the pumpkin was not only healthy, but also really tasty. I may never make polenta without pumpkin again! We had some leftover that Nick ate for dinner the next night, and I have to admit I was a little jealous (not that the leftover soup that I had eaten for the past 5 meals wasn't delicious...) Can't wait to make this again!

    Pumpkin Polenta with Turkey Sausage and Greens (adapted from Cara's Cravings)
    Serves 3 
    Ingredients: 
    For the polenta:
    • 1.5 cups pumpkin puree
    • 3/4 cup course ground polenta (I used Bob's Red Mill)
    • 2.25 cups of water
    • salt and pepper
    For the Turkey Sausage and Greens Saute:
    •  3 links spicy turkey sausage, casing removed
    • 1/2 sweet onion, thinly sliced
    • 3 cloves of garlic, minced
    • 1 tsp olive oil
    • 8 oz trimmed collard greens (I used half a bag of these, which are washed and ready to go)
    • 3/4 cup halved grape tomatoes
    • 2 Tbsp balsamic vinegar
    • 1/4 cup chicken broth
    • salt and pepper
    Directions:
    1. In a nonstick skillet over medium heat, cook the turkey sausage, stirring to crumble.  Once it has cooked through, remove it from the pan and put on a plate lined with a paper towel.
    2. In the same skillet, heat 1 tsp olive oil over medium heat.
    3. Add onion and garlic, sprinkle with salt and pepper, and cook until tender.
    4. Add tomatoes and collard greens to pan and cook for a couple of minutes. Then add chicken broth, balsamic vinegar, and season with salt and pepper. Continue cooking until they are wilted.
    5. Turn off heat and add turkey sausage back to the pan. Set aside.
    6. Combine water and pumpkin in medium or large sauce pan. Bring to a boil. 
    7. Slowly stream in the polenta, stirring constantly so it does not clump. Continue to cook stirring often with a whisk until thickened, about 10-15 minutes. Season with salt and pepper. If you have a handy assistant, they can complete steps 6-7 while you do steps 1-5 :)
    8. If necessary, reheat turkey sausage and greens mixture.
    9. Serve by dividing polenta among plates and topping with turkey sausage and greens mixture.

    Saturday, November 20, 2010

    Healthy Stuffin Muffins

     A few weeks ago I received a loaf of Nature's Pride Oven Classics 100% Whole Wheat Bread as a part of the Foodbuzz Tastemaker Program. I decided it would be perfect to make a "healthified" version of my favorite Thanksgiving side dish- stuffing! Although I suppose it is technically dressing since it isn't stuffed into a turkey. However, "Dressing Muffin" doesn't quite have the same ring to it as "Stuffin Muffin!" I love the muffin form because it not only bakes faster, but it is also a perfectly portioned serving.  Try adding these to your Thanksgiving table for a yummy and healthy side dish!
     
    Ingredients:
    Makes 12 Stuffin Muffins
    • 10 pieces of whole wheat bread, toasted
    • 1 tsp olive oil
    • 2/3 cup finely diced onion
    • 2/3 cup finely diced carrot
    • 2/3 cup finely diced celery
    • 1 cup reduced sodium chicken broth
    • 2 tsp poultry seasoning
    • 3/4 cup Trader Joe's butternut squash soup 
    • 1 egg, beaten
    • salt and pepper
    Directions:
    1. Preheat oven to 375 F.
    2.  Cut toasted bread into cubes and put in a medium bowl.
    3. In a nonstick skillet over medium heat, saute the onion, carrot, and celery in olive oil. Sprinkle with salt and pepper.
    4. Once the veggies begin to soften, add the poultry seasoning. Add a splash of chicken broth and stir around to evenly coat the veggies with the seasoning.
    5. When the veggies have softened, add them to the bowl with the bread cubes.
    6. Add the egg, butternut squash soup, and chicken broth to the bowl and stir around so bread absorbs all the liquid.
    7. Let sit for a few minutes to soak.
    8. Spray a muffin pay with nonstick cooking spray. 
    9. Divide the batter evenly among the muffin pan.
    10. Bake until cooked through- about 25-30 min.

    Thursday, November 11, 2010

    Skinny Mashed Potatoes

     Mashed potatoes are a classic American side dish, but I always shy away from them because the generally have so much butter and cream added to make them "good." I have made some in the past that I thought turned out ok, but they weren't really "blog-worthy." Now I am happy to say that I have found the recipe that I will be making from now on! They don't have to be unhealthy to taste good!
      Skinny Mashed Potatoes (Serves 4)
    Ingredients:
    • 1 lb red potatoes, diced
    • 8 oz cauliflower
    • 1/4 cup milk 
    • 1/4 reduced sodium chicken broth
    • 1 oz reduced fat cream cheese
    • 1/4 tsp ground black pepper
    • 3/4 tsp kosher salt (use less if using regular table salt) 
    • chives (optional) 
    Directions:
    1. Steam potatoes and cauliflower until fork tender.
    2. Heat milk, chicken broth, and reduced fat cream cheese in a microwave-safe bowl for about 30 seconds.
    3. Add potatoes, cauliflower, salt, and pepper to the bowl.
    4. Mash all ingredients together until desired consistency is reached. (Don't use a food processor or hand blender unless you want them to be like glue... learned that one the hard way!)
    5. Top with chives and serve!
    Approx nutrition facts per serving:
    Calories: 115
    Fat: 0.5 g
    Carbs: 23g
    Protein: 5g

    Saturday, November 6, 2010

    Rustic Cranberry Apple Galette with Preserved Walnuts

     I love "rustic" dishes because basically that means you don't have to be precise or make it look perfect. It's charming all on its own. This galette was full of fall flavors, and I loved that it wasn't overly sweet. I also liked the pop of the tart cranberries contrasted with the sweetness of the apples. The addition of the preserved walnuts was a special treat, but you can definitely substitute regular walnuts or leave them out altogether. I had never even heard of preserved walnuts before, but Nick's mom gave us some on our last visit. I was determined to find a way to use them seeing as they aren't the most common ingredient, and this dessert was perfect because they complemented the fruits well. Another plus about this recipe is that it is so easy I was able to throw it together on weeknight!
     Rustic Cranberry Apple Galette with Preserved Walnuts
    Ingredients:
    • 1 unbaked pie crust
    • 2 large apples, large diced- about 1 lb (I used Jonagold) 
    • 1/2 cup cranberries
    • 1/2 cup chopped preserved walnuts (or regular walnuts)
    • 1.5 Tbsp cinnamon
    • 3 Tbsp sugar
    Directions:
    1. Pre heat oven to 350 degrees F.
    2. Toss apples, cranberries, walnuts, cinnamon and sugar together in a bowl.
    3. Roll out pie crust and place on a baking sheet lined with parchment paper.
    4. Place cranberry apple filling in middle of the pie crust, leaving a border of about 1-2 inches. The pile will probably appear to be too much/too high, but this is ok because it will cook down. 
    5. Bake for about 45 minutes or until pie crust has browned slightly.
    6. Let cool for at least 15-20 minutes before serving. 

    Sunday, October 31, 2010

    Pumpkin Whoopie Pies

     I think the best thing about fall is pumpkin- actually I know it is the best thing! I first made these whoopie pies about 3 years ago and never made them again because they were too addictive! The soft, moist texture of the cookie/cake is hinted with fall spice and the sweetness is matched perfectly with the slightly tangy cream cheese filling. I knew it was time for the hiatus to end so this pumpkin lover's birthday could be properly celebrated! These treats are perfect for Halloween, Thanksgiving, or even your office party :)

    Pumpkin Whoopie Pies (adapted from Brown Eyed Baker)
    Makes about 2 dozen whoopie pies 
    Ingredients:
    For Whoopie Pies-
    • 3 cups all-purpose flour
    • 2 tablespoons cinnamon
    • 1 teaspoon baking powder
    • 1 teaspoon baking soda
    • 1 teaspoon salt
    • 1½ teaspoons pumpkin pie spice
    • 1 cup granulated sugar
    • 1 cup dark brown sugar
    • 1 cup canola or vegetable oil
    • 3 cups canned pumpkin puree
    • 2 eggs
    • 1 teaspoon vanilla extract
    For Maple Cream Cheese Filling:
    • 2.5 - 3 cups powdered sugar (start with 2.5 and add more if you want it sweeter!)
    • 8 ounces reduced fat cream cheese, at room temperature
    • 1 stickunsalted butter, at room temperature
    • 3 tablespoons maple syrup (I used grade A dark amber)
    • 1 teaspoon vanilla extract
      Directions:
      1. Preheat oven to 350 degrees F. Line baking sheets with parchment paper.
      2. In a large bowl, whisk together the flour, cinnamon, baking powder, baking soda, salt, and pumpkin pie spice. 
      3. In a separate bowl, add the granulated sugar, dark brown sugar, oil, pumpkin puree, eggs and vanilla together and whisk until combined.
      4. Gradually add the flour mixture to the pumpkin mixture and stir just until completely combined.
      5. Use a large spoon to drop a rounded, heaping tablespoon of the dough onto the prepared baking sheets, about 1 inch apart.
      6. Bake for 10 to 12 minutes, until they look done and a toothpick inserted into the center of a cookie comes out clean. The cookies should be firm, but not overly so when touched. Remove from the oven and let the cookies cool completely.
      7. To make the filling, beat the butter on medium speed until smooth. Add the cream cheese, maple syrup, and vanilla. Beat until smooth and combined, about 2 minutes. Add the powdered sugar and beat until smooth.
      8. To assemble the whoopie pies: Turn half of the cooled cookies upside down. Pipe or spoon the filling onto that half. Place another cookie, flat side down, on top of the filling. Press down slightly so that the filling spread to the edges of the cookie. Repeat until all the cookies are used.
      9. Store in a single layer if possible, but if not, use parchment paper between layers. 

      Wednesday, October 27, 2010

      Cinnamon Sugar Donut Mini Muffins

       I am not sure what it is about donuts, but something about them always draws me to them. I think it is probably the pretty sprinkles and icing. I have always wanted to make them despite my deep dislike of all things deep fried. I tried once, and it was an utter failure (not to mention my whole house smelled like "fried"), and I vowed to never fry anything again. Then there are the baked donuts you can make, but they require a special pan that I just can't justify buying, at least not for now :) So, when I came across a recipe for donut muffins, I was sold. I think their name describes them perfectly as they really taste like a cross between a muffin and a cake donut! And I definitely suggest going for mini muffin size because then they are like little donut holes.
       Cinnamon Sugar Donut Mini Muffins (adapted from Very Culinary)
      Makes about 24-30 mini muffins
      Ingredients:
      For Muffins:
      • 3 cups all purpose flour
      • 2 1/2 teaspoons baking powder
      • 3/4 teaspoon salt
      • 1/2 teaspoon freshly ground nutmeg
      • 1/4 teaspoon baking soda
      • 3/4 cup milk, at room temperature
      • 2 tablespoons buttermilk, at room temperature
      • 10 tablespoons unsalted butter, at room temperature
      • 3/4 cup plus 2 tablespoons sugar
      • 2 large eggs, at room temperature
      For Cinnamon Sugar Coating:
      • 1 cup sugar
      • 1 tablespoon ground cinnamon
      • 6 tablespoons unsalted butter, melted
      Directions:
      1. Preheat oven to 375 degrees. Spray mini muffin pan with nonstick cooking spray with flour.
      2. In a medium bowl, sift together the flour, baking powder, salt, nutmeg, and baking soda. 
      3. In a separate bowl, whisk together the milk and buttermilk.
      4. In a large bowl, beat butter and sugar with a mixer until light and fluffy. Beat in eggs, one at a time, until just combined. Set mixer on low speed, and beat in one fourth of the dry ingredients. Then beat in one third of the milk mixture. Continue to alternate until all ingredients are incorporated, finishing with dry ingredients. Be careful not to over mix
      5.  Fill the prepared muffin cups with batter. Bake until lightly golden and firm to the touch, about 15 minutes. Let the muffins cool in the pan for 5 minutes. Remove the muffins from the tin and let cool.
      6. Combine cinnamon and sugar in a ziploc bag. (I recommend gallon size, but quart would probably work). Once the muffins have cooled, brush each one with the melted butter.Then place a few muffins in the bag with the cinnamon and sugar mixture. Shake well to coat the muffins. Repeat.

      Thursday, October 21, 2010

      Italian Sausage and Vegetables over Bulgur


      I have had a box of bulgur in my pantry for a very long time. Let's just say I have owned this box since I was in college...that's right, it was at least 4 years ago. So, when I came across Roni's recipe for Sausage and Vegetables over Bulgur, I knew that was exactly what I was going to make to finally get rid of the box! The only thing that backfired is that now I want to buy more of it. It is super healthy- high in fiber and protein, and it is a good source of iron and B vitamins. What more could you ask for? I basically love anything that has a marinara or tomato type sauce, and this one was no exception. The sausage with the peppers, onions and green beans go really well together making it a very warm and comforting meal. It also comes together easily and is perfect for weeknight meal. I loved the bulgur in this recipe, but you could also substitute a whole wheat pasta if you want.
      Italian Sausage and Vegetables over Bulgur (adapted from Green Lite Bites)
      Serves 4
      Ingredients:
      • 1 cup of dry bulgur
      • 1 sweet onion, large diced
      • 1 package of Spicy Italian Turkey Sausage cut in pieces
      • 2 Bell peppers (I used one red and one green), sliced
      • About 1 cup of  frozen green beans, thawed
      • 1 15oz can of tomato sauce
      • 1 tsp dried basil
      Directions:
      1. Cook bulgur according to directions on package.
      2.  While the bulgur is cooking, spray a large skillet with non-stick cooking spray. Start to cook the onion and peppers over medium high heat. Add the sausage and brown it. Then add the green beans.
      3. Cook for 1-2 minutes and add the can of sauce plus about 1/4 can of water.
      4.  Sprinkle with basil and bring to a boil. Cover and simmer for about 5 minutes allowing the flavors to merge.
      5. Once the bulgur is done, scoop  it into bowls and top with vegetable tomato sauce. 

      Sunday, October 17, 2010

      Peach Upsidedown Cake

      I made this cake a few weeks ago- just in time to catch the end of peach season. This recipe was a great way to bake with peaches because they are the star of the cake so their natural deliciousness doesn't get lost! The cake had a great texture. It was moist with a good crumb and a light cinnamon flavor without being overly sweet. Now I know peach season is over so you may be wondering why I am giving you this recipe now. I promise it's not just to torture you! The original recipe from Dorie Greenspan (which can be found here) uses cranberries, which is the perfect fall and winter fruit!
       Peach Upsidedown Cake (adapted from The Crumbly Cookie)
      Recipe is for 9" round pan. I halved it and baked in 6" round pan. 
      Ingredients:
      •  2 peaches
      • 1 cup all purpose flour
      • 1 tsp baking powder
      • 1 tsp ground cinnamon
      • 1/4 tsp salt
      • 1 3/4 sticks unsalted butter, room temperature
      • 3/4 cups sugar
      • 2 large eggs
      • 1 tsp vanilla extract
      • 1/3 cup 2% milk
       Directions:
      1. Preheat oven to 350 degrees.
      2. Spray round cake pay with nonstick baking spray with flour.
      3. Whisk together the flour, baking powder, salt and cinnamon.
      4. In a small sauce pan, melt 6 Tbsp butter. Stir in 1/4 cup sugar and cook stirring constantly until it comes to a boil. Pour evenly into cake pan.
      5. Arrange peach slices in cake pan with sugar in whatever pattern you want so they cover bottom of pan. Set aside.
      6. In a separate bowl, whisk together the flour, baking powder, salt and cinnamon.
      7. In another bowl, beat the remaining stick of butter with a hand or stand mixer until smooth.
      8. Add 1/2 cup sugar and beat until smooth and creamy. 
      9. Add the eggs one at a time, beating for 1 minute after each addition and scraping down the bowl as needed. Stir in the vanilla. 
      10. Reduce the mixer speed to low and add half of the flour mixture. Stir to combine. Add the milk followed by the rest of the dry ingredients. 
      11. Spoon the batter over the peaches and smooth the top with a rubber spatula.
      12. Bake for 40-45 minutes, or until a toothpick can be inserted and comes out clean. Remove from the oven and let cool for 5-10 minutes. Run a blunt knife between the sides of the pan and the cake. Carefully turn the cake out onto a serving platter.
      13. Serve warm or at room temperature. Top with ice cream if desired.


        Saturday, October 9, 2010

        Chili Spiced Chickpeas

        In my efforts to eat less packaged snack foods, I decided to try roasting some chickpeas to have on hand rather than having crackers or even my beloved soy crisps. The only problem I have found is that I eat them too quickly so they aren't around long enough! They require very little prep time and are budget-friendly because a can of chickpeas costs like $0.89, which is a definite plus! You can use a variety of seasonings to create many different flavor combinations. So far I have just stuck with one because I like it so much, but really I should branch out... I didn't measure my spices, but I included approximate amounts below.
         Chili Spiced Chickpeas
        Ingredients:
        • 1 can chickpeas, drained and rinsed and patted dry
        • 1 tsp olive oil
        • kosher salt (about 1/4 tsp)
        • chili powder (about 1/2 tsp)
        • cumin (about 1/2 tsp)
        • garlic powder (about 1/4 tsp)
        Directions:
        1. Preheat oven to 350 degrees.
        2. Spread chickpeas evenly across a sheet pan lined with foil.
        3. Lightly spray chickpeas with olive oil. 
        4. Evenly sprinkle spices over chickpeas. 
        5. Bake until crispy- about 45 minutes. 
        6. Once they have cooled, store in a ziploc bag. 

        Tuesday, September 28, 2010

        Lentil Burgers

         This was my first attempt at homemade veggie burgers...and they were delicious! I received a free sample of lentils in the mail and wasn't sure what I wanted to do with them. I had searched several recipes when I found this lentil burger recipe. They sounded delicious to me but I wasn't sure how Nick would like them. I tried them anyway, and even this meat lover was happy with them, which is a good thing because they will definitely be made again!
         Lentil Veggie Burgers (adapted from Kath Eats Real Food)
        Makes 3 burgers
        Ingredients:
        • 1 cup cooked lentils (I used 1/2 cup uncooked and cooked them in water and veggie broth)
        • 2/3 cup chopped veggies (I used yellow pepper, carrot, celery, green onion)
        • 2 tbsp whole wheat flour
        • 3 tbsp pecans
        • 1 tbsp chia seeds
        • 1/2 tbsp olive oil
        • 1/2 tsp kosher salt
        • 1/4 tsp pepper
         Directions:
        1. Preheat oven to 400 degrees F. 
        2. Combine all ingredients in food processor and process until all blended together. 
        3. Form into 3 patties. 
        4. Place patties onto a baking sheet and bake for 15 minutes on each side. 
         

          Tuesday, September 21, 2010

          Lemon Poppy Seed Cake with Raspberry Filling

           I love it when I get the opportunity to make someone's birthday cake. It is just so fun picking out what to make them and hoping they like it! For Jenny's birthday, the only instruction I had was "no coconut," but other than that the opportunities were endless! After much debate, I decided on this pretty cake and thought it would be perfect for her because it was bright, cheery, and fun!
          It had a light, fluffy texture with zesty lemon flavor and a slight crunch from the poppy seeds. The raspberry filling complemented it well in flavor and provided a pretty contrast of pink color.  I chose to use a lemon cream cheese frosting rather than the lemon buttercream. While I can't compare the two, I was happy with the way the cream cheese frosting turned out so I would stick with that in the future too!

          Lemon Poppy Seed Cake (adapted from Annie's Eats)

          Ingredients:
          For the cake:
          • 2 1/3 cups cake flour
          • 2 3/4 tsp. baking powder
          • 1/4 tsp. salt
          • 1 1/2 tbsp. poppy seeds
          • 5 large egg whites, at room temperature
          • 1/4 tsp. cream of tartar
          • 1 1/2 cups sugar
          • 2 tbsp. finely grated lemon zest
          • 12 tsbp. unsalted butter, at room temperature
          • 1 cup 2% milk
          For raspberry filling:
          • 8 tbsp. unsalted butter
          • 1 12-oz. package frozen raspberries, thawed
          • 5 large egg yolks, lightly beaten
          • 3/4 cup sugar
          • Pinch of salt
          For Lemon Cream Cheese Frosting: (from All Recipes)
          • 8 oz package reduced fat cream cheese, thawed
          • 1 stick butter
          • 2 Tbsp lemon juice
          • 1 tsp vanilla
          • 2 tsp lemon zest
          • 5 cups powdered sugar 
          Directions:
          For the cake:
          1. Preheat oven to 350 degrees F.
          2. Spray 3 8" round cake pans with cooking spray with flour
          3. Whisk together the flour, baking powder, poppy seed, and salt in a medium bowl. Set aside.
          4. In a clean, dry bowl, beat egg whites with a hand mixer or stand mixer with whisk attachment until foamy. Add cream of tartar and beat on high speed until stiff peaks form. Set aside. 
          5. Place butter in a clean bowl and beat on medium speed until smooth.
          6. Add the sugar and beat until incorporated.  Mix in the lemon zest.  Beat the mixture on medium-high speed until light and fluffy.
          7.  Add 1/4 cup of the milk and beat until just blended.  Reduce the speed to low and add the flour mixture alternately with the remaining milk in three batches, beginning and ending with the flour.  Beat until just blended.
          8. Using a rubber spatula, fold one quarter of the egg whites into the batter. Be careful not to deflate the mixture!  Once incorporated, add in the rest of the whites and gently fold in until well combined.
          9. Divide batter evenly between the three cake pans.
          10. Bake for 18-20 or until a toothpick inserted in the middle comes out clean.
          11. Let cool in pans for about 10 minutes and then flip them out onto a cooling rack or wax/parchment paper to cool completely.

          For the raspberry filling:
          1. Melt the butter in a large saucepan over medium heat.
          2. Add the raspberries, egg yolks, sugar and salt, and cook, mashing the berries.  Stir frequently at first and then constantly at the end, until thickened, about 10 minutes.
          3. Cool to room temperature. Cover and refrigerate until ready to serve. 
           

          For the Lemon Cream Cheese Frosting:
          1. Beat cream cheese, butter, lemon juice, lemon rind, and vanilla together until smooth and fluffy. 
          2. Add powdered sugar in 2 additions. Beat until creamy. Add more sugar or juice as needed for easy spreading.

          Friday, September 17, 2010

          Salmon with roasted corn puree, okra, and tomatoes

          Not too long ago, I made this corn soup that was so good I had a hard time saving a cup of it for this recipe, but I am so glad I did!This was one of my favorite meals that I have made. The sweetness of the corn and the slight spice on the salmon was delicious! Nick even said it was like something he would order at a restaurant. And the best part is that it isn't too hard! Well, once you have the soup leftover, the rest comes together in no time.
          Salmon with Roasted Corn Puree, Okra, and Tomatoes
          Ingredients:
          Directions:
          1.  Preheat oven to 400 degrees. 
          2. Spread okra and tomatoes on a baking sheet. Spray with olive oil. Sprinkle with salt and pepper.
          3. Roast okra and tomatoes for about 20-25 minutes or until they start to slightly brown.
          4. While vegetables are cooking, combine corn soup and milk. Puree with an immersion blender until it reaches desired consistency. You can also put it in a blender to mix. 
          5. Once vegetables are done and out of the oven, turn on the broiler. 
          6. Place salmon on a baking sheet and sprinkle with Potlatch seasoning. 
          7.  Place salmon in oven and broil until it is cooked through. Mine took about 8-10 minutes, but it will depend on the thickness of your fish.
          8. To serve- spread a thin later of corn puree on your plate, place fish in the middle, and place tomatoes and okra around the outside.
          9. Enjoy!

          Wednesday, September 8, 2010

          Oprah's Favortite Turkey Burger

          Oprah. She's everywhere. I never imagined her name would be on my blog, and I kind of preferred it that way. Oh well- I digress. She does have good taste in turkey burgers! My friend, Clint, INSISTED that I try this recipe because they are the BEST turkey burgers. Well...yes. Yes, they are. They are not quite as easy as these (which are also yummy), but they really do have a great flavor and are worth the extra effort if you have the time. I wasn't sure how I would feel about them because they contained some sweet ingredients, and I'm not a big fan of sweet with meat, but these really didn't taste sweet because all the flavors were balanced out really well. Put these on your menu next time you make turkey burgers!
          The original recipe can be found here, but the recipe as I made them (scaled down and a couple minor changes) is below.

          Mar-a-Lago Turkey Burger (serves 4)
          Ingredients:
          • 1 lb ground turkey breast
          • 1 Tbsp thinly sliced green onions
          • 2 Tbsp thinly sliced celery
          • 1 granny smith apple, peeled and diced
          • 1 tsp olive oil 
          • salt and pepper
          • 1 tsp jalapeno hot sauce (we didn't have Tabasco, but I loved the jalapeno sauce!)
          • 1/2 lemon, juiced
          • 2 Tbsp Major Grey's Chutney (found near mustard/condiments in grocery store)
          Directions:
          1. Saute onions, celery, and apple with olive oil in a skillet until tender. Set aside to cool.
          2. Combine sauteed veggies/apple, ground turkey, hot sauce, lemon juice, and Major Grey's Chutney in a bowl. Add a dash of salt and pepper, and mix until thoroughly combined. 
          3. Shape into 4 burgers of equal size.
          In the original recipe, the burgers are grilled, but we do not currently have a grill so we cooked them in a cast iron skillet with great results. Directions for each method are below.
          For Grill:
          1. Refrigerate burgers for 2 hours. (They will hold together better on the grill.)
          2. Place burgers on a preheated, lightly oiled grill. Grill each side for 7 minutes until meat is thoroughly cooked. Let sit for about 5 minutes before serving.
          For Skillet:
          1. Heat cast iron skillet over medium low heat and spray with cooking spray or olive oil to prevent sticking. 
          2. Place burgers in pan and cook on each side until thoroughly cooked through. It was about 6 minutes per side for us. Be careful not to overcook because they will dry out. You may want to cut one in half to make sure middle is done though.  Let sit 5 minutes before serving.
          We ate them with lettuce, tomato, light mayo and more hot sauce. Delicious! 

          Saturday, September 4, 2010

          Easy Peanut Butter Graham Cookies

          When I made these cookies, I thought I would experiment a bit and add in graham cracker crumbs. Most of my "experiments" don't turn out that well, but I was happy to find out that these were delicious! They are not all that different, but they have a subtle graham flavor and a great texture. They are a little more crumbly but still chewy at the same time. I even made Nick do a side by side comparison of the original and these, and these won! 
            Ingredients:
          • 1 cup creamy or crunchy peanut butter (I used Jif creamy)
          • 1/2 cup brown sugar
          • 1/2 cup granulated sugar
          • 1 egg
          • 1/4 tsp kosher salt (optional)
          • 1 tsp baking powder
          • 1/2 cup graham cracker crumbs
          Directions:
          1. Preheat oven to 350 degrees F.  
          2. Line baking sheet with parchment paper.
          3. In a bowl, stir together peanut butter and sugars until well combined.  Add egg, salt, and baking soda and stir until completely incorporated.  
          4. Roll into tablespoon-sized balls and create a cris-cross pattern with a fork. 
          5. Bake for 8-10 minutes, until lightly browned.  
          6. Slide parchment paper off baking sheet and let cool for at least 10 minutes, and enjoy!

          Saturday, August 28, 2010

          Creamy Roasted Corn Soup

          Summer is my favorite season, and one of the best things about it are the delicious fruits and vegetables. It seems that summer is coming to an end way too quickly, and I didn't want to miss the chance to take advantage of the fresh corn at the farmer's market. When I saw this recipe, I knew it was the perfect recipe to showcase the natural sweetness of the corn. I also loved how healthy it was. Generally thick, creamy soups like this are made with cream and butter, but this one is thickened with rice and pureed corn and squash. The corn we bought was so good that I had to restrain myself from eating all of it raw! And the soup was so delicious that I wanted to eat the whole pot myself. Unfortunately, I had to share it with Nick... I topped it with some leftover roasted okra, but really it was lost in the soup so no worries if you don't have any!
          Creamy Roasted Corn Soup (adapted from Naturally Ella)
          Serves 2
          Ingredients:
          • 3 ears of sweet corn
          • 1 medium yellow squash
          • 1 Anaheim pepper, diced (remove seeds for less heat)
          • 1 clove garlic
          • 1 Tbsp olive oil
          •  2 cups vegetable broth
          • 1 cup water
          • 1/2 cup white rice
          • 1/2 cup skim milk 
          • salt and pepper
          Directions:
          1. Preheat oven to 400 degrees.
          2. Remove the husk and silk from the corn and cut off the kernels. I found it helpful to put it in a bowl and cut so the kernels don't fly everywhere.  
          3. Dice the squash, garlic and peppers and toss with olive oil.
          4. Spread vegetables on a baking sheet and sprinkle with salt and pepper and roast for 30-35 minutes.
          5. Meanwhile combine broth, water, and rice in a medium pot. Bring to a boil and then reduce to a simmer until rice is cooked.
          6. When the vegetables are done roasting, add them to the broth and rice. 
          7. With an immersion blender, blend mixture until it has very few chunks left in it. 
          8. Add milk and blend until thoroughly incorporated. Reheat soup if needed. 

          Thursday, August 19, 2010

          Roasted Tomato Sauce with Turkey Sausage


          Warning: This is not a quick and easy recipe. You do not want to make it on a weeknight when you get home from a long day at work. Now that we got that out the way... this is an entirely delicious pasta sauce that you DO want to make! And make it soon- before tomato season is over!! As I have said before, I was always "anti- making my own pasta sauce" because I didn't think it could be that much better. But, I have to say, it is really worth it when you have the time. This recipe is similar to the sauce I made earlier this year, but the big difference is that it uses fresh tomatoes!Ah, so good....

          Roasted Tomato Sauce with Turkey Sausage (adapted from Culinary Disaster)
          Ingredients:
          • 3 lbs tomatoes (I used fresh Roma from our farmer's market)
          • 1 red pepper
          • 5 cloves garlic
          • olive oil, about 2-3 Tbsp total
          • 1 cup red wine (I used a pinot noir)
          • 1 onion
          • 1 lb spicy turkey sausage, casing removed
          • pinch of rosemary, thyme, and oregano
          • dash of crushed red pepper flakes (optional)
          Directions:
          1. Preheat oven to 425 degrees.
          2. Cut an X in the bottom of the tomatoes (just enough to break the skin).
          3. Place the pepper, tomatoes, and garlic cloves on a baking sheet and rub with  1-2 Tbsp olive oil.
          4. Roast for 45 minutes to an hour. If they do not look charred at this point, you may want to broil them for a few minutes. (I broiled mine on low for about 5-10 minutes at the end.)
          5. Remove pan from the oven and cover with plastic wrap for 10 minutes. This will make everything easier to peel.
          6. Peel tomatoes, pepper, and garlic once they are cool enough to handle. 
          7. Heat a medium or large pan with about 1 Tbsp olive oil over medium heat.
          8. Add turkey sausage to the pan, stirring to crumble. Once sausage is cooked, remove it from the pan. 
          9. Add onion to the pan and saute until it softens.
          10. Add the cup of wine to the pan to deglaze, scraping any browned bits from the sausage and onion with a wooden spoon. Reduce wine by half.
          11. While it is reducing, blend the peeled pepper, tomatoes, and garlic. I used my wonderful stick blender, but you can use a regular blender if you don't have one. 
          12. Add tomato mixture and spices (oregano, rosemary, and thyme) to the pan with the wine and onion. Raise to a simmer.
          13. Add the sausage back to the pan and simmer together for about 30 minutes.   

          Friday, August 13, 2010

          Lemon Blueberry "Cheesecake" Muffins

          I threw these muffins together last week just using some stuff I had on hand and had no intention of adding them to the blog, but Nick convinced me otherwise. Every time he ate one he kept saying how much he liked them, especially the texture. So, I had to try one and was surprised that they turned out as well as they did. They are have a light lemon flavor that goes great with the burst of blueberry flavor hidden in the bottom of them, and the texture is very unique- almost like a hybrid between a muffin and cheesecake.
           Ingredients:
          • 1/2 cup butter, softened
          • 8 oz part-skim ricotta cheese
          • 2 oz  nonfat greek yogurt
          • 2 eggs
          • 1/2 tsp salt
          • juice of 2 meyer lemons (regular are fine if you can't find meyer)
          • 1 cup granulated sugar
          • 1 cup cake flour
          • 2 tsps baking powder
          • 1 tsp vanilla
          • 1 cup fresh blueberries
          Directions:
          1. Preheat oven to 350 degrees.
          2. In a medium bowl, combine flour, salt, and baking powder.
          3. In a second bowl, cream together butter, sugar, eggs,  Greek yogurt and ricotta. Stir in vanilla and lemon juice.
          4. Add dry ingredients and stir until completely incorporated, but be careful not to over mix. 
          5. Stir in blueberries.
          6. Line muffin pan with cupcake liners or spray with nonstick cooking spray and divide batter among prepared muffin cups.
          7. Bake until done (when a toothpick comes out clean). Mine took about 25 minutes.

          Sunday, August 8, 2010

          Baked Tilapia with Dill Sour Cream

          It seems that I keep adding to my list of "things to make" a lot faster than I am actually able to make them, but lately I have noticed a tendency of being drawn to the "easy recipes" first. This one is no exception! It requires minimal work, but you wouldn't know it from the results! I love the flavor of dill, and it especially goes well with fish. I initially saw this recipe on Kalyn's Kitchen, but made a few changes that are shown below. I also used tilapia instead of halibut because it was easier to find and cheaper, but you could use any mild white fish you wish.
           Baked Tilapia with Dill Sour Cream
          Serves 2 (adapted from Kalyn's Kitchen)
          Ingredients:
          • 2-3 tilapia filets (about 8-12oz total)
          • 3 Tbsp low fat sour cream
          • 1 Tbsp mayo made with olive oil
          • 1 clove garlic, minced (or 1/4 tsp garlic powder)
          • 1/8 tsp Beau Monde seasoning (optional, but I like it!)
          • 1 Tbsp grated Parmesan cheese
          • 1 Tbsp fresh dill, chopped (you can use dried, but reduce to 1/2 tsp)
          • salt and pepper
          • 3 green onions, sliced
           Directions: 
          1.  Preheat oven to 375 degrees.
          2.  Season tilapia with salt and pepper and place in a baking dish.
          3. Combine sour cream, mayo, beau monde, garlic, dill, and Parmesan.
          4. Spread an even layer of the sour cream mixture over the fish.
          5. Bake for 15-20 min until firm. This will vary depending on the thickness of your fish. (Ours took about 16 min, but the fillets were pretty thin). 
          6. Sprinkle with green onions and serve. 

          Friday, August 6, 2010

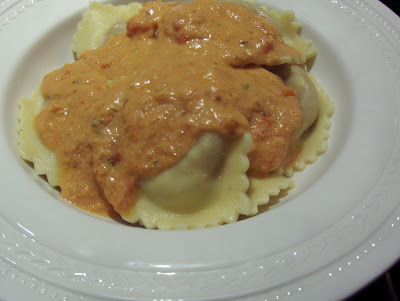
          Buitoni Braised Beef and Sausage Ravioli

          Most nights I enjoy cooking dinner, but sometimes its the last thing I want to do or I just don't have time unless I want to eat dinner at 8:30 or later! It's nights like these that I generally turn to the freezer for a quick meal. That's why I was really excited to receive my choice of a Buitoni Riserva Frozen Pasta as a part of the Foodbuzz Tastemaker program. Since I knew that Nick would mostly likely be eating this (or at least MOST of it!) I let him pick which one he wanted to try, and he chose the Braised Beef and Sausage Ravioli with Creamy Marinara! I have to say it was a good choice! He really liked it and was happy to eat it since he was wanting some pasta for dinner! I liked that the pasta and sauce could be cooked in one pot for easy clean up, and once the water boiled, it was ready in 5 minutes! I also liked the taste of the ravioli, but I didn't care much for the sauce. Although I don't know that my opinion should count since I think all creamy sauces are just too rich for me. Overall, I give it a good review...and apologize for the picture- I promise it tastes better than it looks!